Bath Mat for Resurfaced Baths

0

Bath Mat especially made for resurfaced baths.

Ordinary bath mats can stain and damage a bath. When they are used on resurfaced baths they can cause damage to the bath.

We now provide a fantastic Bath Mat made especially for resurfaced baths. This bath mat uses inside-out, cup-free suction that stays firm while being gentle on the bathtub finish.

By simply standing on the mat’s reversed suction rings and putting pressure on them the grip increases. This mat helps prevent slipping & sliding. The upraised design also massages the soles of your feet!


IDEAL FOR YOUNG CHILDREN AND THE ELDERLY: These cup-free, non-slippery bath mats are an essential safety measure in homes with young children or the elderly. Suitable for any residence or commercial setting such as gyms, specialty care facilities, Hospitals, Hotels and Nursing Homes.

THE MAT IS EASY TO CLEAN & ECO-FRIENDLY:  Made from natural rubber with NO toxic PVC vinyl, our recyclable mats are washable in warm water. They are soap scum-resistant, and won’t scuff or leave residue on a re-surfaced bathtub.

PREVENT ACCIDENTS: Our stay-in-place reverse-suction mats measure 30” long x 16” wide. The Mat is also designed to help prevent damage to remodelled porcelain and fibreglass tubs with textured surfaces.

Order direct from our Amazon shop OR CALL US 07967 333 030

BUY NOW

Chrome Effect Plastic Plug

0

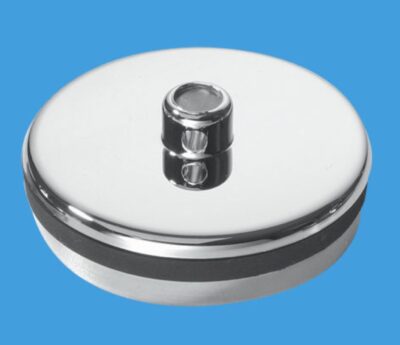
Chrome Effect Plastic Plug.

When we resurface a bath or basin we often find lots of little chips around the plug hole area caused by the heavy metal plug. Sometimes they can be seen but sometimes we can just feel. The technician will repair them as part of the job.

Off course we do not want the newly resurfaced bath to be destined for the same fate. Sometimes people fit rubber plugs but we prefer the look of a chrome plug.

We provide Chrome Effect Plastic plugs for both the bath and basin. The plug is lightweight so it does not damage the bath or basin in the same way as a heavy metal plug. It still looks good and is very easy to fit to a chain.


You can buy them from our Online Amazon Shop or you can call us on 07967 333 030 to purchase them. Just now only £5 including postage.

BUY NOW


Can I change the colour of my bathroom suite?

0

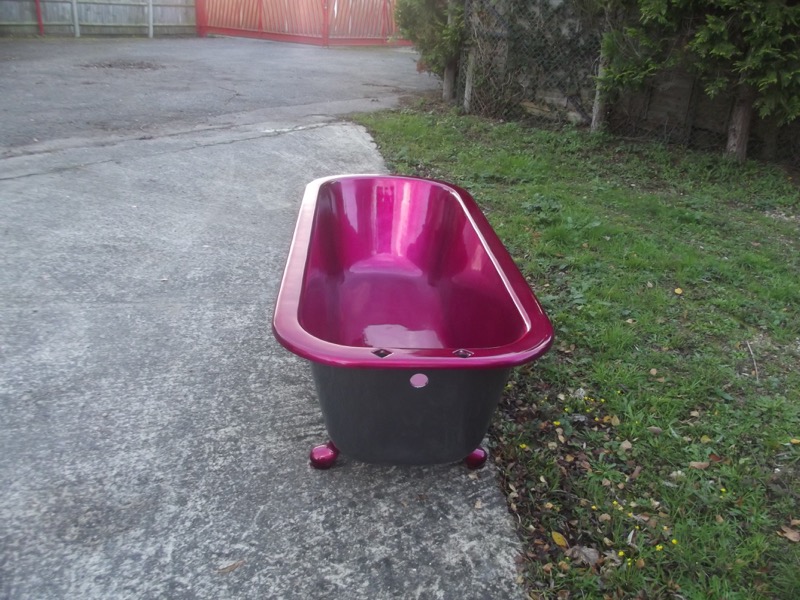
Can I change the colour of my bathroom suite?

Absolutely you can. We get some common requests and some not so.

Most people contact us with coloured suites hoping to restore them to white.  The effect of doing this is quite dramatic. The whole bathroom looks completely different. Below is a bathroom suite we resurfaced from a peachy colour to white.

The whole coloured suite

The whole suite resurfaced to white

As you can see the bathroom looks completely different and the suite looks brand new!

We do also get unusual requests such as turning a white suite black or even resurfacing the items to more unique colours.

Below we have a basin and w/c we changed from white to black.

WHITE BASIN RESURFACED TO A GLOSS BLACK

White toilet resurfaced to black

Below is one of my favourites. A white roll top bath resurfaced to cherry pink and grey! It is very unique.

Cherry Pink Resurfaced Interior

Cherry pink Foot with Matt Grey exterior

As you can see from the above pictures really almost anything can be done. The only limit is imagination.

If you are looking at getting your sanitary ware resurfaced to white or indeed any colour then please do contact us at sales@thebathbusiness.co.uk for a free quote or give us a call on 07967 333 03


Quick Quote

Please send us the job you need done. We'll get you a rapid, FREE, no-commitment quotation.
  • This field is for validation purposes and should be left unchanged.


Worn Cast Iron Bath Resurfaced

0

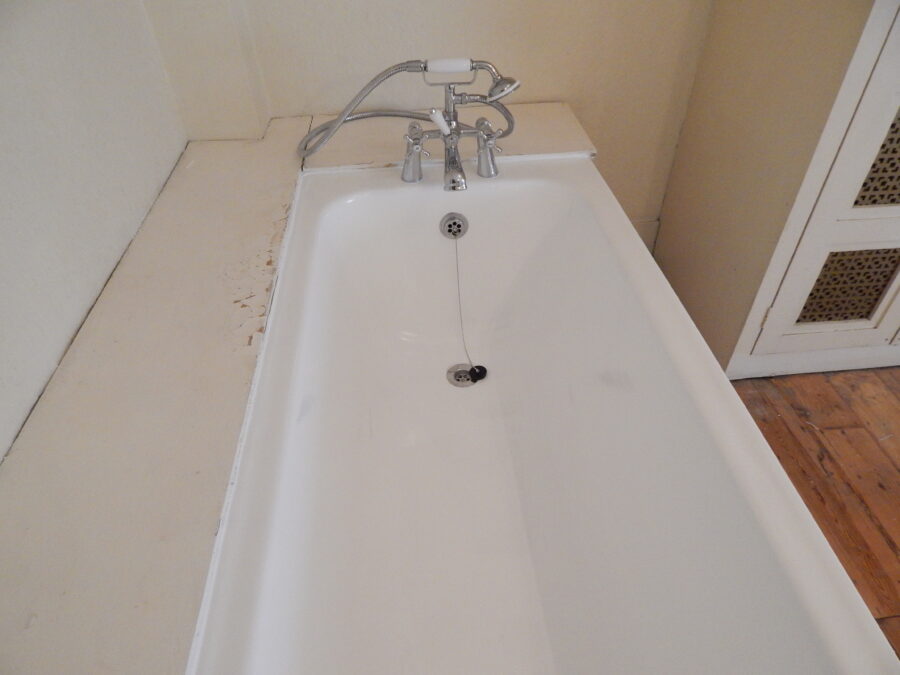
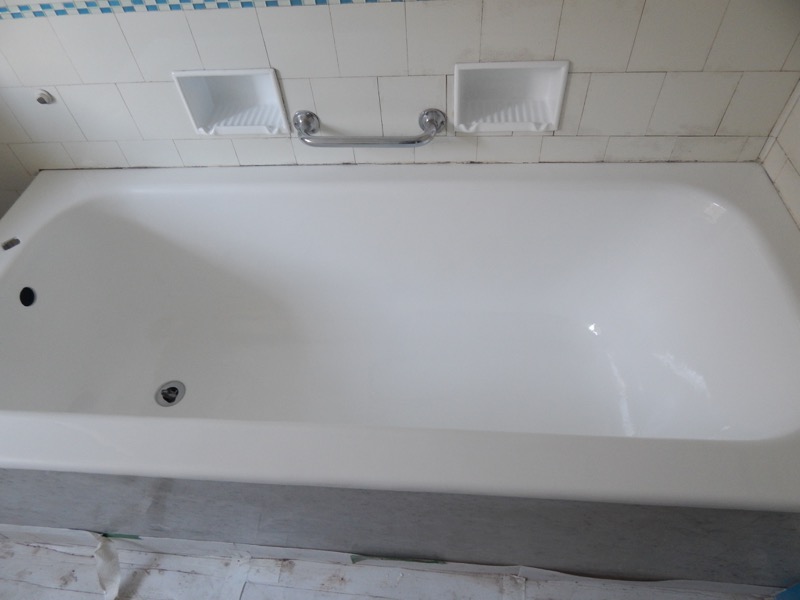
Worn Cast Iron Bath Resurfaced

Below are some pictures of a standard sized cast iron bath that we ultimately resurfaced. This was a bath we worked on in Ealing, London. But this style of bath is very common the length and breadth of the country. This style would have  been installed in thousands of homes, especially during the 1950s-60s.

These were pretty good baths and they did the job they were designed for just fine. However, literally after decades of use the wear and tear can really start to show.

The bath below is overall in pretty good condition for its age, except at the tap end. The enamel around the waste is wearing thin and there has been a past issue with the taps resulting in stained and etching from the shoulder at the tap end down into the bath itself. You can get an idea from the pictures below:

Worn Cast Iron Bath

Worn Cast Iron Bath

Worn Bath

In such circumstances, resurfacing the bath can give it a new lease of life and take something which has perhaps been letting the rest of the bathroom down into something that lifts the whole room. We are in and out in a day and the bath is usable first thing the next.

Here was how the bath looked when we had finished for the day:

Resurfaced Bath

Resurfaced bath

Chip Repair on a Pressed Steel Bath

0

Chip Repairs

Of all the repair work we do on Baths, sinks and the like, the most common is repairing a chip or chips on pressed steel baths. Pressed steel baths have many advantages over cast iron. They are lighter, cheaper and easier to install. They also have advantages over most acrylic baths. They are longer lasting generally. There is less flexing and movement of the bath when in use so problems such as putting your knee through the bath or cracks appearing, as sometimes occurs with acrylic baths, does not occur with a pressed steel bath.

But a major dis-advantage of pressed steel is the fact of the enamel being very hard and brittle. So much so that when there is an impact on the surface of the bath, the enamel can’t flex or absorb the impact and often a chip of enamel is knocked of the surface of the bath. Often (in fact usually in my experience) the chip exposes the metal below the enamel. As the metal is treated and black, it really shows up against the enamel.

Here is a picture of a chip on a pressed-steel bath. This was a repair done in a home near Rochester:

Chip on a pressed steel bath


The first issue with a chip is cosmetic. It just looks wrong in a bath and does tend to catch the eye. The second issue is that left long enough, rust can start to form. And that, left long enough, can work its way though the steel of the bath and you can end up with a hole.

The good news is that it does tend to take a long time for this to happen, especially on higher end pressed-steel baths which tend to use a thicker steel in the construction of their baths. But it is best to repair the chip. as soon as possible.

So a repair of a chip on a pressed steel bath serves two purposes: the first is cosmetic and takes the eye of the damages area. The second is that the repair keep the water from being in direct contact with the steel and so prevents rusting or corroding of the metal below.

The chip in this pressed steel bath has “disappeared”

It would seem that for most people, the primary reason to get a  chip repair done is cosmetic. We can certainly rectify this.

The level of repair we go for is that if someone was to walk into the room after we have done the work, they wouldn’t see the repaired area, their eye wouldn’t be drawn to it and catch on it. Often however, we can get it to the point where the customer themselves cannot see the repair or locate where the original chip was located.

The secret to getting an invisible repair, or very close to invisible, is that we make the colour onsite to match the item we are repairing. We don’t use a selection of several shades of white (most repairs, especially of pressed steel, are some shade of white) and go with the closest. What we do is we actually build the colour onsite to match the specific item we are repairing. It can be a lot of work trying to match a colour onsite, especially if the lighting in the room isn’t great and it adds a lot of time to the process but it’s the best way we have found to make repair as good and as invisible as possible

Showe Tray Resurfacing

0

Here is the stone shower tray before we resurfaced it.

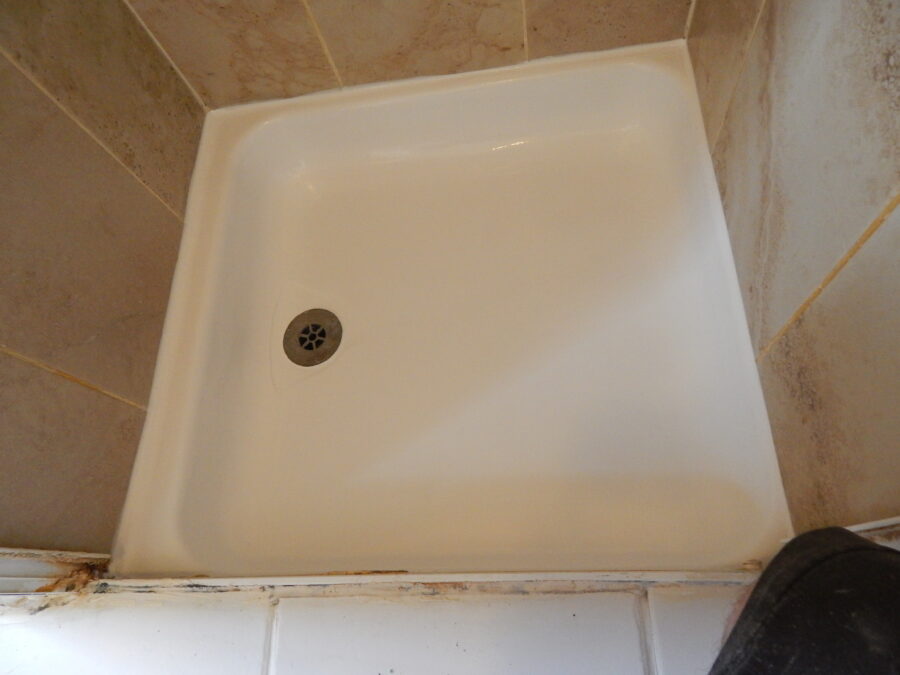
Above is a cast iron Shower Tray we were asked to sort out in the Ealing area of London. The tray is a little unusual in that it is made from enamelled Cast Iron. Most shower trays are formed from Gel-coated Stone Resin.

As you can see the enamel has taken a bit of a beating through years of use, especially around the waste, where water has sat for long periods and actually worn the enamel away right back to the cast iron, which has then started to rust.

You can see the damage around the waste area better in this picture:

Cast Iron Shower Tray Damage around Waste

Other parts of the tray have had a bit of wear and tear but the waste area was by far the worst area of the whole shower tray.

To sort out the shower tray first of all we cleaned up the surface. Then we removed the limescale and any rust that had built up. We also made good the chips in the enamel, masked off walls, etc and then resurfaced the tray in white (the customer wanted to go with white rather then the peach colour of the original). We frequently resurface shower tray to a new colour.

Once we had finished the Shower Tray looked like this:

Here is the lovely end result of resurfacing a cast iron shower tray.

If you would like help getting your shower tray resurfaced give us a call on 07967 333 030 or email us at thebathbsuinessuk@hotmail.co.uk

Antique Sink with Legs Restored

0

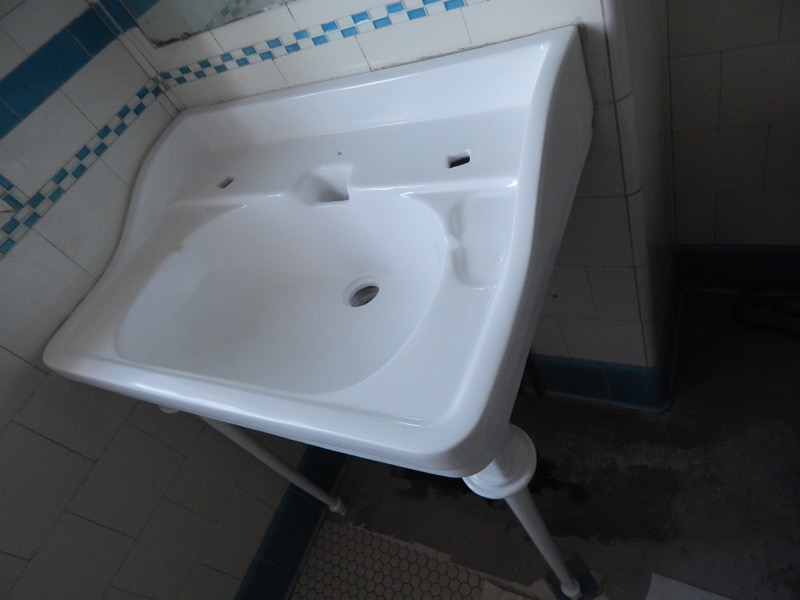
Antique sink restoration, including legs

We are called upon to restore quite a few antique sinks. On some it’s a case of handling the staining and crazing which has built up over many, many decades of use. On others we have to repair cracks or even, on occasion, put together sinks which have been smashed.

The sink below was one in which it was just a case of handling the crazing and staining. This is quite typical of sinks this age.

This sink was in the Lewisham area of London. It had the original legs. They also required restoring along with the rest of the sink.

Here is the sink prior to restoring it:

Antique basin before resurfacing

Here is a further away shot showing the legs of the sink which are original:

Lovely antique basin with legs

On sinks like this it is worth noting that they all tend to be a very off-white colour. They usually almost have a yellow tint to them. And quite often they have a logo stamped on them which is very much part of the character and attraction of these antiques.

We can restore them with a brilliant white finish or we can match the existing colour and restore them to that colour. And, if we have matched the existing colour of the sink, we can retain the logo too if this is desired by the client.

On the sink above, the customer was really only concerned with the crazing and discolouration and wanted a sink which looked bright and fresh. So the basic white was used in the restoration.

Here is the sink after it’s restoration:

Basin after resurfacing


Lovely basin after resurfacing

What do you think? Would you like us to restore your sink?

Toilet Resurfacing.

0
Staining built up under Rim

Sometimes we restore toilets for our customers. It’s something people might not be aware can be done and so here is an example what we do with toilets

This was a job we did near Worthing on the South Coast. The toilet had built up a very solid coating on limescale in the bottom of the bowl and further staining under the rim.

Here is the limescale build-up in the bowl of the toilet:

lIMESCALE BUILT UP ON TOILET

This picture shows the staining which had built up under the rim:

Staining built up under Rim

Apart from the build-up of limescale and staining, the toilet itself was in pretty good condition and the customer wanted to keep it.

First we removed the limescale and staining. Even with the limescale removed, the bowl was discoloured and slightly rough, so we removed the seat and resurfaced the toilet. Once the surface was dry, it was quality checked and the seat re-applied.

The whole job was done in a day and the toilet was back in use the next.

This comparative lack of disruption was a factor for this customer in getting us in to do the job.

His didn’t need to find and purchase another toilet and get someone in to fit and he certainly didn’t have to worry about issues with the floor tiles (the floor tiles were laid after the toilet was originally fitted and the tiles were cut to fit around this specific toilet).

Here is the finished toilet after resurfacing:

Repair to Hole in a bath.

0

This job was to fill in and make good a hole which had been cut in the top corner of a pressed steel bath.

The bath was in a property in the Chiswick area of London. The bathroom was having quite a lot of work done to it (tiling, etc) but they wanted to keep the existing bath.

The only issue with the bath was the hole in the corner.

The hole was originally cut so that a shower attachment could be fitted there. But with the re-fit, this was no longer needed.

Here is the hole in question:

Damaged Bath before Repair

First, fibreglass was applied to the hole and then fillers were used to make the area smooth.

Once the filling was done, a colour was made up onsite to match the off-white colour of the bath.

This colour was applied the repair and allowed to dry.

Once dry it was then lightly polished.

The end result was a hole repair which looks and feel the same as the rest of the bath.

Here is the finished job:

After Repair

Fireclay Sink Restoration

0
Fireclay After Resurfacing

Large Fireclay Sink Restoration.

This was an interesting project we did for a customer in Palmers Green in London.

He had on old (and very large) sink made from fireclay in his kitchen. Usually these sink are recessed into a worktop and only the top and front of the sink are visible with the rest of the sink hidden.

However, the customer wanted his sink to be sitting on a support without any worktop around it and as a result the sides of the sink, as well as the front and top, would be on display. 

Here is the bowl of the sink in question showing the wear typical of a sink of this type and age.

This picture shows one end of the sink and also what was unusual about this job.

When these sinks are made, one end never gets any porcelian glaze or enamel applied to it and also there are 4 circular holes just over an inch in diameter in this end of the sink, one on each corner. You can hopefully make out the two holes on the end of the sink closest to the camera.

The lack of glaze and the holes are part and parcel of the manufacturing process and generally it’s not a problem as this end of the sink is hidden from sight below the worktop.

However, it was a bit of an issue here with this sink what with it all being on display.

We filled and made good the holes on this end of the sink, as well as smoothed of the fireclay here as it was noticeably rougher than the rest of the sink which had been glazed.

Then we resurfaced the whole sink, including this end.


Fireclay Basin After

Here is the bowl of the sink. The bowl is now a uniform colour and the wear and staining has been dealt with.

Fireclay After Resurfacing

Here is the bowl of the sink. The bowl is now a uniform colour and the wear and staining has been dealt with.

© Copyright The Bath Business - Theme by Pexeto
Call Now ButtonGet a Quote